You may already consume weed, but do you really know about the plant? The neat flower you can buy is just a small part of the story, but unless you grow it, you might not know the rest. Whether you’re interested in growing your own weed or just interested in what exactly you’re consuming and how it came to be, this guide to each cannabis growth stage may be of interest to you.
Cannabis is an annual dioecious flowering plant, meaning it germinates, reaches sexual maturity, reproduces, and dies all in one year when wild. If you want the full breakdown, here are the stages of the cannabis plant life cycle.
RELATED: 5 unexpected ways to grow your canna-business with data
Germination
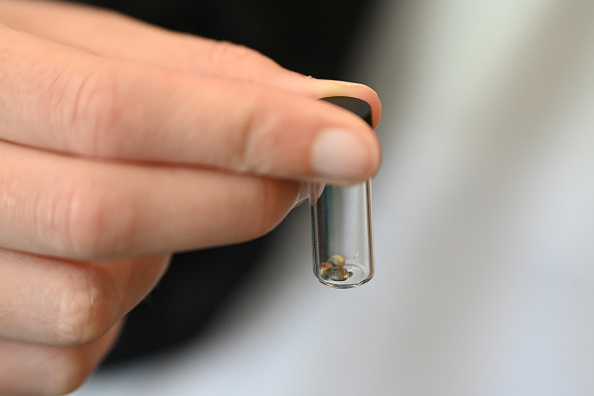
The first step to growing any plant is to get its seeds to sprout. You’ve probably done so in an elementary school science class, but the process may look a bit different for weed. First, a seed can’t grow if it’s not ready. A mature seed will be shiny, light to dark brown, and will feel dry and hard to the touch. If they aren’t ready to be planted just yet, they will be soft and appear white or green.
After planting a mature seed, it needs to absorb sufficient water and be kept in a dark place. Some wrap them in a moist paper towel to do so. The germination process may take up to eight days to begin—you’ll know it’s happened once the taproot anchors in the ground and two rounded leaves, called cotyledons, sprout from the stem. These leaves get energy from sunlight.
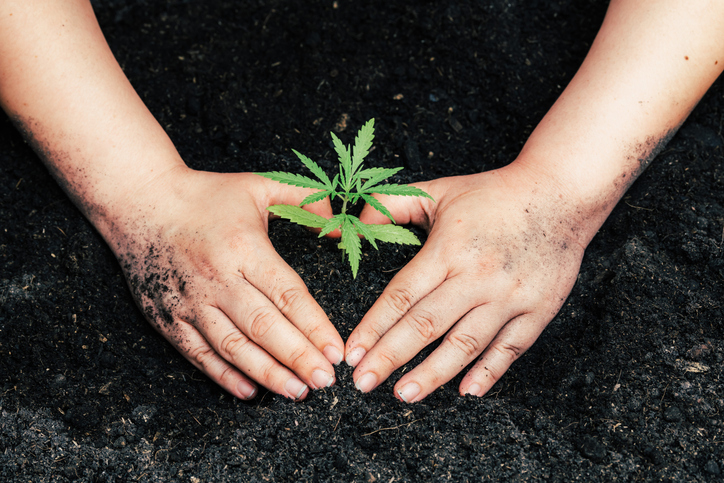
Seedling
Once a cannabis plant’s cotyledons are exposed and have started to photosynthesize, it’s officially a seedling. Seedlings are fragile, so the care has to step up in the one to four weeks in this stage.
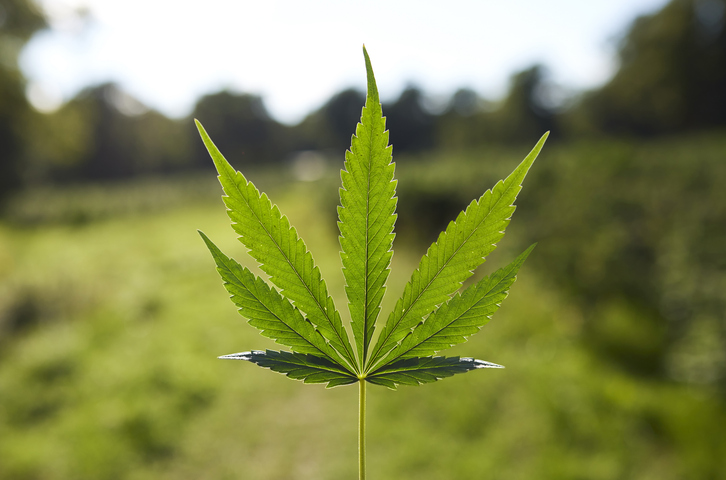
Seedlings must receive 18-24 hours of sunlight, moist soil, and mild humidity to grow properly—many use fluorescent lights as they are convenient yet reliable sources of constant light. This is when the plant really starts to look like the traditional image of weed, with the signature leaves with serrated edges. The leaves will start with only one “finger,” and will not be considered a mature marijuana plant until it has at least three, but usually between five and seven.
Growing environments should be clean and should have minimal moisture to prevent disease and mold.
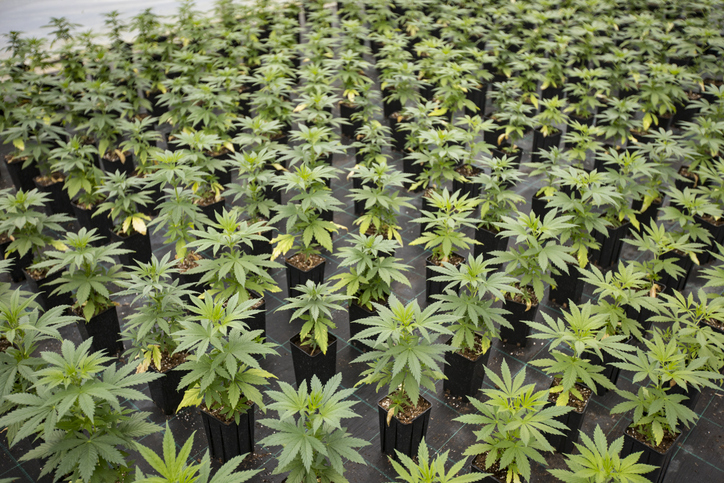
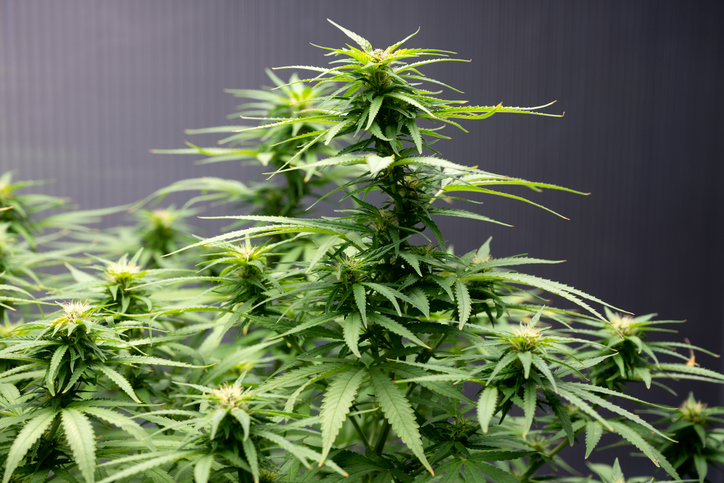
Vegetative
A seedling that develops at least three sets of leaves has officially entered the vegetative phase. The plant will grow rapidly at this stage—more leaves sprout, the stem becomes thicker and taller, and the roots become more solid to provide the plant with the necessary nutrients.
During the vegetative phase, the plants need more warm water, moist air, soil space, and light. They will need more light than dark per day: typically, they will be kept on 18-hour light and 6-hour dark cycles. Cannabinoids begin to develop during this stage, but the plants won’t have any real medicinal benefits during the one to two months of vegetative growth.
Pre-Flowering
Flowering
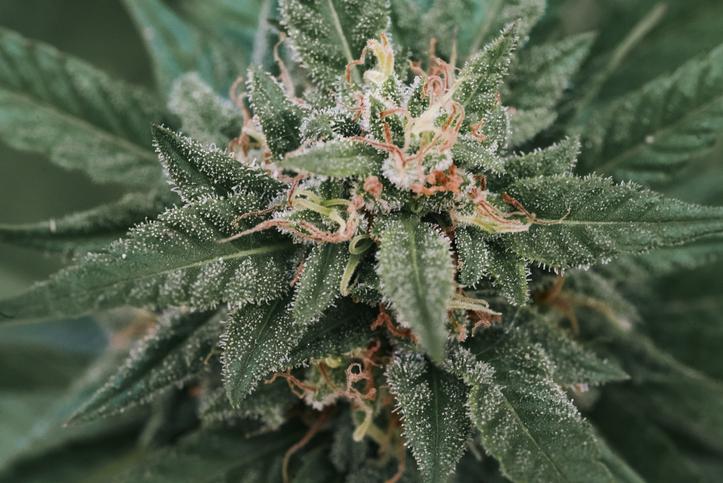
Your plant has officially flowered! This will happen naturally when your plant receives 12 hours of light and 12 hours of darkness. This schedule happens naturally if growing occurs outside.
This will be the time when you can for sure tell your plant’s sex by looking at the pre-flower at each of the nodes.
Females will have two pistils growing on each of the buds, while males will have small green sacs of pollen on each node. Male and intersex plants must be removed at this stage as the pollen from the sacs may escape, fertilizing nearby females and ruining their psychoactive potential. Intersex plants especially pose a risk, and they may fertilize themselves.
During this time, the pistils on the buds will turn from white to an orange-ish color. The trichome heads will go from being transparent to milky to opaque to amber. Trichomes are the part of your cannabis plant that produces THC, terpenes, and other cannabinoids. An amber hue means your plant’s CBD to THC ratio is higher.
During this stage, plants need warm weather, medium humidity, and increased nutrients.
Harvesting
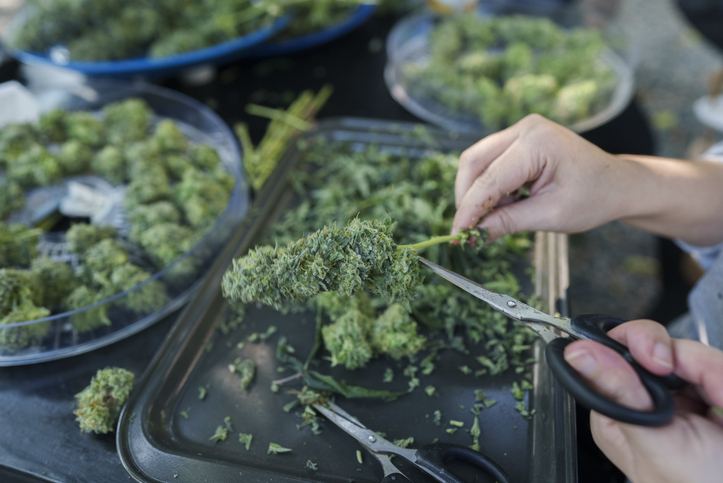
It’s imperative that you harvest your plant in time. The longer you wait, the more your plant’s benefits may fade. If trichomes begin to turn brown, it means your THC is weakening, making your harvest less potent and potentially worth less.
It’s recommended to harvest your plant when half of the trichomes become opaque.
To harvest your newly-grown weed, you must trim the plant into smaller branches and dry it by hanging it upside down for up to two weeks. This drying process removes moisture from the flower to prevent mold and bacteria from growing, extending the weed’s shelf life.
After harvesting, you can choose to cure your flower by placing it in glass jars for days at a time, making sure to incorporate periods of fresh air exposure and rotation. They should be stored between 50 and 60º F.
RELATED: Growing ‘shrooms is simple if you have this
Cannabis growth stage – the full cycle
There you have it: your own weed! It’s a long, labor-intensive process, but it’s extremely rewarding. Hopefully, this guide ensures that your first batch is as safe and high-quality as it can be.